Aging is part of life, but staying strong, mobile and active can make a meaningful difference in how we move through it.
For me, “aging gracefully” is not about looking younger or trying to stop the aging process. It is about maintaining the strength, confidence and physical capacity to keep doing the things that matter to you.
What Does Aging Well Really Mean?
Aging well can mean:
staying strong enough for daily life
maintaining mobility
getting up and down from the floor
carrying groceries
climbing stairs
walking and hiking
keeping your balance
staying independent
continuing activities you enjoy
That is where strength training and mobility work can be especially valuable.
Why Strength Training Matters as We Age
Muscle mass and strength tend to decline with age, especially when we are inactive.
That process is often referred to as sarcopenia.
Strength training can help preserve and build muscle, improve physical function and support independence.
You do not need to lift extremely heavy weights to benefit.
The important thing is to challenge the muscles progressively over time.
Strength Supports Everyday Life
Strength is useful because everyday life requires it.
You need strength to:
stand up from a chair
carry bags
climb stairs
get off the floor
lift objects
garden
travel
play with children or grandchildren
Training for those capacities can make everyday movement feel easier.
Strength Training and Bone Health
Resistance training can also support bone health.
Bones respond to loading, which is one reason strength training is often recommended as part of an active lifestyle as we age.
The exact program should match the individual, especially if osteoporosis or fracture risk is a concern.
Strength and Balance
Strength and balance are closely connected.
Your legs and hips need enough strength to control movement and respond when you lose your balance.
That is why I like combining resistance training with exercises such as:
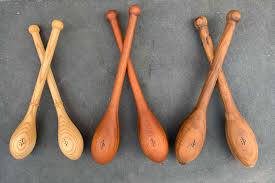
Indian clubs are a traditional training tool used for rhythmic swinging patterns that challenge coordination, shoulder movement, grip and upper-body control.
They are light compared with most strength-training equipment, but the long lever and continuous motion can make them surprisingly demanding. Indian clubs are especially useful for people who enjoy skill-based movement and want a different way to train the shoulders and upper body.
What Are Indian Clubs?
Indian clubs are weighted clubs, traditionally made from wood, that are swung through circular and looping patterns.
Modern clubs come in different sizes and weights. Lighter clubs are commonly used for coordination, mobility and skill practice, while heavier club variations can be used for more demanding strength work.
Beginners usually do better starting light and learning the movement patterns before increasing load.
A Brief History of Indian Clubs
Club-swinging traditions have roots in South Asia and the Middle East, where wrestlers and soldiers used heavier club-like implements as part of physical training.
In India, traditional tools such as the jori and mudgar have long been associated with wrestling and strength culture.
During the 19th century, lighter forms of club swinging became popular in Britain, Europe and North America and were incorporated into military training, physical education and gymnasium programs.
Modern Indian club training is generally lighter and more movement-focused than traditional heavy-club training.
Why Train With Indian Clubs?
Indian clubs offer a different challenge than dumbbells or machines.
The swinging patterns require timing, coordination and control as the club moves around the body.
They can be useful for:
shoulder movement
grip and forearm endurance
coordination
rhythm
upper-body mobility
body awareness
learning rotational movement
They can also simply be fun.
Shoulder Mobility and Control
Indian clubs move the shoulders through circular patterns that are difficult to reproduce with many traditional exercises.
That can be useful for practicing comfortable overhead and rotational movement.
I would avoid claiming that Indian clubs lubricate joints, prevent shoulder pain or automatically improve shoulder health.
They are a movement tool, not a treatment.
Grip and Wrist Training
Holding and controlling the club requires the hands, wrists and forearms to work continuously.
Because the weight sits farther away from the hand than it would with a dumbbell, even a light club can create noticeable leverage.
This can make club training useful for grip endurance and wrist control.
Coordination and Rhythm
One of the biggest benefits of Indian club work is coordination.
You have to control:
the direction of the swing
timing
speed
hand position
shoulder movement
sometimes both arms at once
As the patterns become more complex, the exercise becomes as much about motor learning as muscular effort.
Core and Full-Body Movement
More advanced patterns can include rotation, stepping or pivoting.
That brings in the trunk, hips and legs.
The core is not necessarily being “activated” in a special way; it is simply contributing to whole-body control as you move.
Indian Clubs vs. Heavy Club Training
These are not exactly the same.
Light Indian clubs are usually used for:
coordination
flow
shoulder movement
endurance
skill
Heavier clubs or maces place much greater demands on strength and leverage.
If you are new to club training, do not assume you need a heavy implement to make it effective.
Beginner Indian Club Routine
If you are just starting, use very light clubs and keep the movements slow.
The goal is to learn the pattern rather than create fatigue.
1. Single-Arm Circle
Hold one club and practice a smooth circular path around the shoulder.
Keep the grip relaxed enough that the movement can flow.
Start with 5–10 repetitions each direction.
2. Front Pendulum
Let the club swing gently forward and back in front of the body.
Avoid forcing the range.
Use this to learn how the club responds to momentum.
3. Casting Pattern
From an upright position, guide the club around the shoulder and back to the starting position.
Move slowly at first.
The goal is smoothness rather than speed.
4. Inward Circle
Swing the club inward toward the midline and around the shoulder.
Keep the movement controlled.
Practice one side before trying both arms together.
5. Outward Circle
Reverse the direction so the club travels outward.
Notice whether one direction feels easier than the other.
That is normal.
6. Alternating Mills
Once you are comfortable with basic circles, begin alternating the arms in a rhythmic pattern.
Keep the clubs light.
This is where coordination becomes more challenging.
7. Add a Gentle Pivot
More advanced patterns can include a small foot pivot or torso rotation.
Let the movement come from the whole body rather than twisting only through the shoulder.
Keep this slow until the timing feels natural.
How Heavy Should Indian Clubs Be?
Lighter is usually better when you are learning.
A club that feels almost too light when you first pick it up can become challenging after several minutes of continuous swinging.
There is no universal starting weight.
Choose a load that allows you to:
maintain control
keep the shoulders relaxed
move smoothly
stop the club safely
complete the pattern without straining
Do Not Chase Fatigue
Indian club training does not need to feel exhausting.
Skill quality matters more than burning out your shoulders.
Stop the set if:
your grip is failing
the club starts pulling you out of position
your movement becomes jerky
you lose control of the swing
Rest, reset and continue later.
Indian Clubs and Rehabilitation
I would be careful with the old claim that Indian clubs are widely used for rehabilitation or that they restore joint function.
Some rehabilitation professionals may use club-style movements, but that does not make Indian clubs appropriate for every shoulder, elbow or wrist problem.
If you have persistent pain or are recovering from an injury, get appropriate assessment before adding swinging exercises.
Can Indian Clubs Prevent Injury?
No exercise can guarantee injury prevention.
Indian clubs can help build movement options, coordination and tolerance to certain shoulder positions.
That can be valuable, but injury risk is influenced by many factors.
Flow and Mindfulness
Because club patterns are rhythmic and repetitive, some people find them enjoyable and absorbing.
That can make training feel almost meditative.
But I would present that as a personal experience rather than claiming Indian clubs create a specific neurological “flow state.”
How Often Should You Practice?
You do not need to practice every day.
A few short sessions each week can be enough to learn the movements and improve coordination.
Start with 5–10 minutes and build gradually.
Quality matters more than duration.
Who Might Enjoy Indian Club Training?
Indian clubs may appeal to:
people who enjoy movement skills
martial artists
dancers
climbers
strength trainees
yoga practitioners
circus and flow-arts enthusiasts
anyone looking for a more playful upper-body training tool
They can complement traditional strength training rather than replace it.
Indian Clubs and Circus Arts
There is a natural crossover between club training and circus or flow-based movement because both involve rhythm, timing and coordination.
The Turkish Get-Up is a complex full-body exercise that moves you from lying on the floor to standing while holding a weight overhead.
It combines shoulder stability, trunk control, hip mobility, balance and coordination in one movement. That makes it a useful exercise, but not a mandatory one.
You can get many of the same training benefits from other exercises if the Turkish Get-Up does not suit your body, goals or experience level.
What Is the Turkish Get-Up?
The Turkish Get-Up, often shortened to TGU, is usually performed with a kettlebell or dumbbell.
You begin lying on your back with one arm extended toward the ceiling, then move through a series of positions until you are standing. You then reverse the sequence back to the floor.
It is more of a movement skill than a simple strength exercise.
What Does It Train?
The Turkish Get-Up challenges several areas at once:
shoulder stability
core control
hip mobility
leg strength
balance
coordination
overhead control
Because it involves many transitions, it also requires you to stay focused on where your body is in space.
Why People Like the Turkish Get-Up
The TGU is useful because it teaches you to create stability while moving through different positions.
It is especially good for practicing:
controlled transitions
overhead support
getting up from the floor
coordination between the upper and lower body
That makes it a valuable skill exercise for some people.
It Is Not an Injury-Prevention Exercise
I would remove the claim that Turkish Get-Ups prevent injuries.
No exercise can guarantee that.
They can help build strength, control and capacity, which may support better movement, but injury risk depends on many things, including training load, fatigue, previous injury and the activity itself.
Does the Turkish Get-Up Improve Shoulder Stability?
It can challenge shoulder stability because the arm remains loaded overhead while the rest of the body changes position.
The shoulder has to adapt as you roll, press, bridge, kneel and stand.
That can be useful, but only if the overhead position feels comfortable.
If you have shoulder pain or limited overhead range, start without weight or choose another exercise.
Does It Improve Hip Mobility?
The movement does require the hips to move through several positions.
That can help you practice usable range of motion.
But the TGU is not a mobility treatment by itself.
If hip mobility is a major goal, it is better to combine it with dedicated mobility and strength work.
Step 1: Start on the Floor
Lie on your back.
If the weight is in your right hand:
bend the right knee
keep the right foot on the floor
extend the right arm toward the ceiling
place the left arm and leg slightly away from the body
Keep the wrist stacked over the elbow and shoulder.
If you are using a kettlebell, learn how to safely bring it into position before starting.
Step 2: Roll to the Elbow
Press through the bent-leg foot and roll slightly toward the opposite elbow.
Do not try to sit straight up.
Think of rolling across the body.
Keep the loaded arm stable overhead.
Step 3: Come to the Hand
From the elbow, press the supporting hand into the floor and come into a taller seated position.
Pause.
Make sure you feel stable before moving on.
Step 4: Lift the Hips
Press through the planted foot and supporting hand to lift the hips.
You only need enough height to create space for the next step.
Do not turn this into the biggest possible bridge.
Step 5: Sweep the Leg Under
Bring the straight leg underneath your body so the knee lands on the floor.
You should now be in a supported half-kneeling position with one hand still on the ground.
Move slowly.
This is often the most awkward part when learning.
Step 6: Come Upright
Lift the supporting hand from the floor and bring the torso upright.
You should now be in a half-kneeling position with the weight overhead.
Adjust the back leg if needed so you feel balanced.
Step 7: Stand
Press through the front foot and stand tall.
Pause at the top.
Keep the weight controlled overhead.
Then reverse every step to return to the floor.
Start Without Weight
This is one of the best ways to learn the movement.
You can practice with:
an empty hand
a shoe balanced on your fist
a very light dumbbell
a light kettlebell
The goal is to learn the sequence first.
Adding load comes later.
Practice the Pieces Separately
You do not need to perform a complete Turkish Get-Up right away.
Practice:
floor to elbow
elbow to hand
bridge and leg sweep
half-kneeling transitions
standing from half-kneeling
Once those pieces feel comfortable, connect them.
Keep the Movement Slow
The Turkish Get-Up is not a speed exercise.
Move deliberately.
Pause when needed.
If you lose track of the sequence, set the weight down safely and reset.
Do You Have to Keep Your Eyes on the Weight?
Not every second.
Early in the movement, looking toward the weight can help with control.
As you transition into half-kneeling and standing, your gaze may naturally come forward.
The goal is stable shoulder positioning and awareness, not rigidly staring at the kettlebell throughout the entire rep.
Who Should Use Extra Caution?
Take extra care if you have:
shoulder pain
wrist pain
difficulty getting up from the floor
significant balance problems
recent surgery
acute hip or knee pain
There are usually simpler exercises that can build the same qualities without forcing the full movement.
Turkish Get-Up Alternatives
If the TGU does not feel right, you can train similar qualities with:
half-kneeling presses
carries
side planks
step-ups
split squats
floor-to-stand drills
overhead carries
dead bugs
lunges
No single exercise is irreplaceable.
Are Compound Exercises Always Better?
No.
Compound exercises are useful because they train several muscle groups at once, but isolation exercises also have value.
For example, a leg extension, biceps curl or calf raise may be exactly what someone needs depending on the goal.
A good program can include both.
What About Calorie Burn?
I would remove the claim that the Turkish Get-Up is ideal for fat loss because it burns more calories than isolation exercises.
It is a relatively slow, skill-heavy exercise.
Its biggest value is movement quality, strength and control, not calorie expenditure.
What About Hormonal Response?
I would also remove the testosterone and growth-hormone claim.
Exercise can cause temporary hormonal changes, but those short-term spikes are not a useful reason to choose one exercise over another and do not directly determine muscle growth.
Progressive resistance, training volume, recovery and nutrition matter much more.
How to Program the Turkish Get-Up
Keep the volume relatively low because the exercise is complex.
A practical starting point might be:
1–3 reps per side
light to moderate load
slow, controlled movement
You can use it near the beginning of a workout when you are fresh.
Turkish Get-Up as a Skill
The Turkish Get-Up is best thought of as a skill-based strength exercise.
Progress can mean:
smoother transitions
better balance
more control
improved confidence
eventually using more weight
The heaviest kettlebell is not automatically the goal.
The Bigger Picture
The Turkish Get-Up can be an excellent exercise, but it does not deserve “ultimate exercise” status.
It is one tool.
If you enjoy it and it fits your goals, keep it.
If you do not, there are many other ways to build strength, mobility, stability and coordination.
Balance is something we use constantly, whether we are walking, climbing stairs, hiking, stepping over obstacles or simply getting dressed.
As we age, balance can become more challenging because of changes in strength, vision, reaction time, joint mobility and proprioception — our sense of where the body is in space. The good news is that balance is trainable.
Why Balance Matters
Good balance supports everyday movement and can help you stay active and confident.
Balance training can improve coordination and challenge the muscles of the legs, hips and trunk. It can also help you feel more comfortable with tasks that require quick adjustments, uneven surfaces or single-leg control.
Balance Is More Than Standing on One Leg
Balance depends on several systems working together:
vision
inner-ear function
proprioception
muscle strength
joint mobility
reaction time
coordination
That means balance training should include more than simply seeing how long you can stand still.
Start With a Supported Single-Leg Stand
Stand beside a wall, counter or sturdy chair.
Lift one foot slightly from the floor and hold for a few seconds.
Keep your support nearby rather than testing yourself too aggressively.
As this becomes easier, you can progress by:
reducing hand support
turning your head
reaching with one arm
standing on a slightly softer surface
Single-Leg Strength Exercises
Single-leg exercises are useful because they combine balance with strength.
Examples include:
step-ups
supported single-leg deadlifts
split squats
single-leg heel raises
supported single-leg squats
The goal is not to wobble as much as possible. The goal is to stay controlled while gradually increasing the challenge.
Walking and Dynamic Balance
Real-life balance usually happens while moving.
Useful exercises can include:
heel-to-toe walking
walking backward
side stepping
grapevine or crossover steps
changing direction
stepping over small obstacles
These movements can help you practice balance in a way that transfers more naturally to everyday life.
Reaction and Coordination Training
Balance also involves responding to what is happening around you.
Light pods, cones or simple reaction drills can make training more interactive.
For example, you might:
step toward a visual cue
reach in different directions
change direction on command
combine a balance task with catching or tossing a ball
The original article included light pods specifically as a way to train reaction time and coordination.
Balance Boards and BOSU Training
Balance boards and BOSU trainers can add instability and make exercises more challenging.
They are not necessary, though.
A balance board can be useful for controlled weight shifting and proprioception practice, while a BOSU can be used for certain squats, lunges or balance drills.
For beginners or anyone at higher risk of falling, stable-ground balance exercises are usually the best place to start.
Yoga and Tai Chi
Yoga and Tai Chi can both include slow, controlled movements that challenge balance and body awareness.
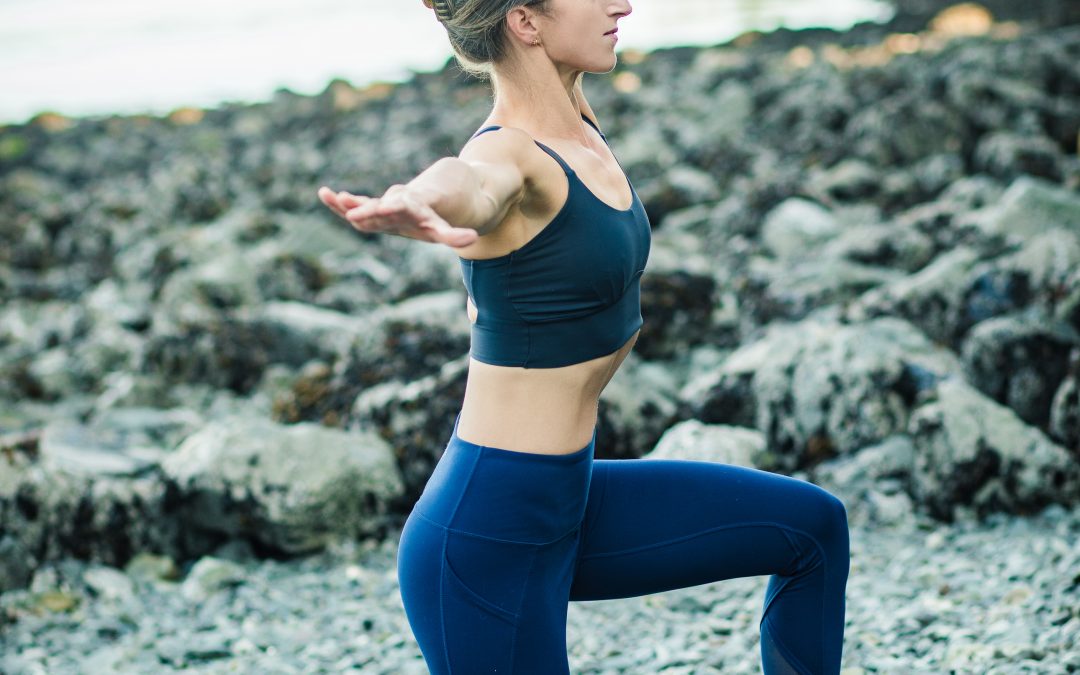
Positions such as Tree Pose, Warrior III and Chair Pose can be useful options when they are appropriate for the individual.
The important part is choosing a variation you can control.
Strength Matters for Balance
Balance training works better when combined with lower-body strength.
Useful exercises include:
squats
step-ups
lunges
calf raises
deadlifts
hip strengthening
Stronger legs and hips give you more capacity to recover when you lose your balance.
Mobility Matters Too
Stiff ankles, hips or thoracic spine can change how you move and how easily you can make balance corrections.
That does not mean every balance problem is caused by poor mobility.
It simply means that strength, mobility and balance often work together.
Does Balance Training Prevent Falls?
Balance training can be an important part of fall-prevention programs, especially when combined with strength training and regular activity.
But I would avoid saying that any single exercise prevents falls.
Falls can be influenced by many factors, including medications, vision, footwear, neurological conditions, environmental hazards and general health.
Balance and the Brain
Balance tasks require attention, coordination and sensory processing.
That makes them mentally engaging.
I would soften the original claim that balance training “boosts cognitive function and neural connections” because that is too broad for a general fitness article.
A better message is that balance exercises can challenge both the body and attention at the same time.
How Often Should You Practice?
Balance does not need hours of daily work.
Short, regular sessions can be effective.
You might include 5–10 minutes of balance work a few times per week, especially alongside strength training.
The original post correctly emphasized that small, consistent efforts can be enough to make progress.
Make It More Difficult Gradually
Progress balance exercises by changing one variable at a time.
For example:
narrower stance
less hand support
longer hold
more movement
head turns
reaching
uneven surface
added resistance
Do not increase everything at once.
Safety Comes First
Practice close to a sturdy support if there is any chance you could fall.
Avoid unstable equipment unless you can use it safely.
If you experience frequent falls, significant dizziness, new balance problems or unexplained weakness, speak with a healthcare professional before trying to train through it.
Balance Is a Skill You Can Keep Developing
Balance can change with age, but it is not something you simply have to lose.
Strength, coordination, mobility and confidence can all be trained.
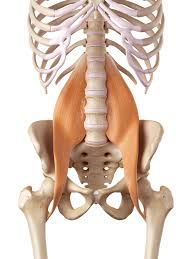
The psoas is an important hip-flexor muscle that connects the lower spine to the femur. It plays a role in hip flexion, trunk control and movement between the spine, pelvis and legs.
It is often blamed for everything from back pain to poor posture and stress, but the psoas is not a “problem muscle” that always needs to be stretched or released. Like most muscles, it can benefit from a mix of strength, mobility and varied movement.
What Is the Psoas?
The psoas major originates along the lumbar spine and attaches to the upper femur at the lesser trochanter.
Together with the iliacus, it forms the iliopsoas, one of the main hip-flexor groups.
Its main jobs include:
flexing the hip
helping control the pelvis and lumbar spine
contributing to trunk stability
assisting with movements such as walking, running and climbing stairs
Is the Psoas a Core Muscle?
The psoas is often grouped into discussions about the “deep core” because of where it attaches and how it interacts with the pelvis and spine.
That does not mean it functions like the transverse abdominis or pelvic floor.
It is better to think of it as a hip flexor with an important relationship to trunk and pelvic control.
The Psoas and Breathing
The psoas sits close to the diaphragm and surrounding connective tissues, but I would avoid saying it directly controls breathing or stress.
Breathing, trunk pressure and movement all interact, but the psoas is not a breathing muscle.
If you notice tension around the front of the hips while breathing or moving, that may reflect posture, position, guarding or workload rather than a “tight psoas” causing the problem.
Signs the Psoas May Need Attention
It is difficult to diagnose a “tight” or “weak” psoas from symptoms alone.
Possible signs that the hip flexors may need more strength or mobility include:
difficulty lifting the knee
discomfort in the front of the hip
stiffness after long periods of sitting
reduced hip extension
difficulty with running or climbing
poor control during leg raises
These symptoms can have many causes, so avoid assuming the psoas is always responsible.
Does Sitting Make the Psoas Tight?
Long periods of sitting keep the hips flexed.
That can make the front of the hips feel stiff when you stand up, but sitting does not automatically create a permanently shortened psoas.
The bigger issue is often lack of movement variety.
If you sit a lot, standing, walking and moving the hips regularly may be more useful than aggressively stretching one muscle.
The Psoas and Low Back Pain
The psoas can contribute to spinal and pelvic mechanics, but it is too simplistic to say that a tight or weak psoas causes lower back pain.
Back pain is influenced by many factors, including:
workload
strength
previous injury
sleep
stress
activity level
sensitivity
movement habits
If back pain persists, it is better to get an appropriate assessment rather than trying to “release the psoas” repeatedly.
The Psoas and Posture
A strong psoas does not automatically create perfect posture, and a tight psoas does not automatically cause anterior pelvic tilt.
Posture is influenced by the entire body and changes throughout the day.
Rather than trying to hold the pelvis in one ideal position, focus on having enough strength and mobility to move comfortably through different positions.
Stress and the Psoas
The psoas is often described online as the “muscle of the soul” or as a place where trauma and stress are stored.
I would not use those claims.
Stress can absolutely influence muscle tension and movement, but there is no strong basis for treating the psoas as a special emotional-storage muscle.
That kind of language can make normal tightness feel more mysterious than it needs to be.
Strengthening the Psoas
The psoas responds to progressive resistance like other muscles.
Useful exercises include:
standing knee raises
seated leg lifts
resisted marching
hanging knee raises
step-ups
uphill walking
banded hip flexion
The key is control and gradual progression.
Standing Knee Raise
Stand tall and lift one knee toward hip height.
Pause briefly, then lower with control.
Use a wall or support if balance is a challenge.
To progress, add a resistance band around the foot.
Seated Single-Leg Raise
Sit with one leg extended.
Lift the heel away from the floor without leaning back excessively.
Keep the movement small if needed.
This is a simple way to challenge hip flexion strength.
Seated Compression Lift
Sit with the legs extended and hands beside the hips.
Press into the floor and try to lift one or both heels.
This can be demanding.
Start with one leg at a time or bend the knees slightly if needed.
Resisted Marching
Loop a resistance band around the feet or anchor it low.
Lift one knee while maintaining trunk control.
This is a practical progression because resistance can be increased gradually.
Step-Ups
Step-ups train the hip flexors along with the glutes and quadriceps.
They also have a strong carryover to stairs and hiking.
Choose a step height that allows you to stay controlled.
Stretching the Front of the Hip
A half-kneeling hip-flexor stretch can be useful if the front of the hip feels stiff.
Instead of pushing the hips forward aggressively, gently tuck the pelvis and shift forward until you feel a mild stretch.
The goal is not to force the deepest possible range.
Hold for 20–30 seconds if it feels comfortable.
Stretching Is Not Always the Answer
If you keep stretching the hip flexors and they still feel tight, you may need strength rather than more stretching.
A muscle can feel tight because it is working hard or lacks confidence in a position.
That is one reason strengthening through range can be more useful than passive stretching alone.


 Aging is part of life, but staying strong, mobile and active can make a meaningful difference in how we move through it.