Yoga With a Wall: Breath, Balance and Alignment

Yoga With a Wall: Breath, Balance and Alignment
 Deep belly breathing mindful breathing, yoga poses wall

A wall can be one of the most useful yoga props. It can provide support, feedback and confidence while you work on balance, standing poses and alignment.

This sequence combines diaphragmatic breathing, core control, lunges and wall-supported standing poses. The focus is on moving slowly enough to notice what your breath and body are doing.

Begin With the Breath

Start lying on your back in constructive rest, with the knees bent and feet on the floor.

Place one hand on the chest and one on the lower ribs or abdomen. Breathe in through the nose and notice the lower ribs and belly gently expand. Exhale without forcing the breath out.

The goal is not to take the biggest breath possible. It is to create a comfortable rhythm and notice how breathing changes as you move.

Use the Breath as Feedback

As you practice, let the breath help guide your effort.

If the breath becomes strained, rushed or difficult to maintain, that may be a sign to slow down, modify the pose or rest.

You can also choose a steady visual point, or drishti, during balance poses. A consistent gaze can make balance easier and help keep your attention on the movement in front of you.

Constructive Rest and Gentle Mobility

Stay on your back and gently move the knees from side to side like windshield wipers.

Then try lifting the legs into tabletop, with the knees over the hips.

Keep the upper body relaxed and return to constructive rest whenever you need a break.

Pelvic Lift

With the feet on the floor, gently tilt or lift the pelvis a small amount.

Move slowly with the breath.

Repeat several times without trying to turn it into a large Bridge Pose.

Core Control

From tabletop, press one hand into the opposite thigh while the thigh presses back into the hand.

Hold for a few breaths, then switch sides.

You can progress by extending one leg away from the body while maintaining control through the trunk.

Keep the lower back comfortable and make the movement smaller if necessary.

All-Fours Core Work

Come onto hands and knees.

Tuck the toes and hover the knees slightly off the floor.

Hold for a few breaths, then lower.

Repeat as needed.

You can also move between Plank and Downward-Facing Dog to warm the shoulders and trunk.

One-Legged Downward Dog to Lunge

From Downward-Facing Dog, lift one leg.

Bring the knee toward the chest, then step the foot forward into a Low Lunge.

Move back toward Half Split and forward into the lunge several times.

Keep the movement slow enough to control the transition.

Balance Progression

From the lunge, shift weight into the front leg.

Experiment with lifting the back foot and moving toward a supported Standing Split or single-leg hinge.

Use blocks or a wall rather than trying to force the range.

Repeat on the second side.

Lizard Lunge

From Downward-Facing Dog, step one foot outside the hand.

Stay upright or lower onto blocks.

If you add a quadriceps stretch, keep the movement comfortable and avoid pulling aggressively on the back leg.

Why Use a Wall in Yoga?

A wall can serve several purposes.

Support

The wall can make balance poses more accessible.

For example, you can use it for:

  • Tree Pose
  • Warrior III
  • Half Moon
  • standing quadriceps stretches

Feedback

A wall can help you notice where different parts of the body are in space.

It can be useful for learning how the feet, pelvis, ribs and shoulders relate to one another.

Confidence

The wall can reduce fear in balance poses because you know support is nearby.

That often makes it easier to explore the pose without gripping or rushing.

Resistance

You can gently press into the wall to create muscular engagement and learn how force travels through the body.

Warrior II at the Wall

Use the wall as a reference while setting up Warrior II.

Let the front knee bend comfortably and keep the stance stable.

Rather than forcing the hips or shoulders into one exact position, use the wall to notice how your body naturally organizes itself.

Side Angle Pose

From Warrior II, bring the forearm to the thigh or the hand toward a block.

Reach the top arm overhead or keep it on the hip.

The wall can help with balance while you experiment with the shape.

Triangle Pose

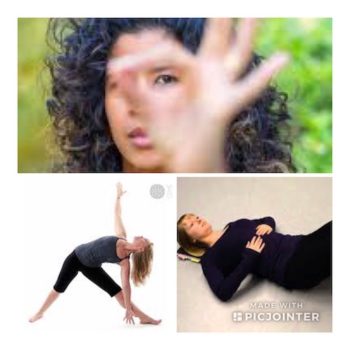
Straighten the front leg and move into Triangle Pose.

Use a block, chair or wall if needed.

Think about length through both sides of the torso rather than trying to reach the bottom hand as low as possible.

Triangle is often used symbolically in yoga philosophy, but physically it is simply an opportunity to explore stability, rotation and side-body length.

Half Moon Pose

Half Moon can be much more accessible with a wall.

Place the back body lightly against the wall and use a block under the lower hand.

Once the balance feels steady, you can gradually reduce how much support you use.

Finish With Slower Movement

After the standing work, return to the floor.

Try:

  • Child’s Pose
  • a gentle Supine Twist
  • Supported Bridge
  • Savasana or constructive rest

Let the breath return to normal.

Mindfulness Without Forcing Stillness

Sitting completely still does not automatically make the mind calm, and yoga does not “detox” the body or guarantee mental peace.

What stillness can do is give you an opportunity to notice what is happening without immediately reacting.

You can practice simply observing the breath, sensations and thoughts for a few minutes.

If the mind is busy, that does not mean you are doing it wrong.

Keep the Practice Simple

A wall can make yoga more accessible, not less advanced.

Support is useful when it allows you to understand the pose better, breathe more comfortably or move with more control.

If you want to explore supported yoga and mobility in person, learn more about Yoga & Mobility Classes in Nanaimo.

You may also enjoy Yoga Breathwork: Ujjayi, Nadi Shodhana & More and Classical Sun Salutations and Yin-Inspired Yoga Sequence.
Ujjayi Breath: How to Use Yogic Breathing in Your Yoga Practice

Ujjayi Breath: How to Use Yogic Breathing in Your Yoga Practice

Ujjayi breath is a breathing technique often used in Vinyasa and other flow-based yoga practices. It involves breathing through the nose while gently narrowing the back of the throat, creating a soft sound sometimes compared to ocean waves.

For many people, that sound becomes a point of focus. It can help create a steady rhythm and make it easier to coordinate movement with breath.

What Is Ujjayi Breath?

Ujjayi is sometimes translated as “victorious breath.” The technique is created by gently narrowing the throat while breathing in and out through the nose.

The breath should feel smooth rather than forced. You do not need to make it loud.

A simple way to learn it is to imagine fogging a mirror with your mouth open, then try to create that same sensation with the mouth closed.

Why Use Ujjayi in Yoga?

Ujjayi breath can give you something steady to pay attention to while you move.

During a yoga flow, it may help you:

  • slow the pace of your breathing
  • stay more focused on the present moment
  • coordinate breath with movement
  • notice when you are working too hard
  • create a more meditative quality in your practice

It is not necessary to use Ujjayi during every yoga class, and it should never feel strained.

Keep the Breath Comfortable

One common mistake is trying to make Ujjayi too strong or too loud.

The throat should only narrow slightly. If you feel tension in the jaw, neck or throat, soften the breath.

You should still be able to breathe comfortably. If you feel dizzy, light-headed or short of breath, return to normal breathing.

How to Practice Ujjayi Breath

Sit or stand comfortably and begin with normal nasal breathing.

Take a slow breath in, then exhale as if you were quietly fogging a mirror.

Repeat that a few times with the mouth open.

Next, close the mouth and try to keep the same gentle throat sensation while breathing through the nose.

Listen for a soft sound in the back of the throat.

Once it feels natural, begin pairing the breath with simple movements.

Linking Breath and Movement

In yoga, the breath can help create rhythm.

For example:

  • inhale as you lengthen or reach upward
  • exhale as you fold, twist or move into a more compact shape
  • inhale as you move into Cow
  • exhale as you round into Cat
  • inhale as you rise
  • exhale as you lower

These are guidelines rather than rigid rules. Comfort and steady breathing matter more than forcing every movement to match perfectly.

A Yoga Sequence Using Ujjayi Breath

Here is a simple flow that can be used to explore breath and movement together.

Warm-Up

Move through Cat and Cow several times, breathing slowly.

Then come into Downward-Facing Dog and stay for a few comfortable breaths.

Walk toward the front of the mat and alternate between a Half Lift and Forward Fold.

Rise to Mountain Pose and pause.

Sun Salutation

Move through a simple Sun Salutation at a pace that allows you to keep the breath steady.

You might include:

  • Mountain Pose
  • Forward Fold
  • Half Lift
  • Plank
  • Cobra or another backbend variation
  • Downward-Facing Dog
  • Low Lunge
  • return to standing

Rather than rushing, let each breath help determine the pace.

Flow 1: Grounding and Strength

Move into Crescent Lunge and explore reaching the arms up and opening them into cactus arms.

Transition into Humble Warrior if comfortable, then straighten the front leg into Pyramid Pose.

Return to a Low Lunge and add a gentle twist.

Move through Plank and lower to the belly before coming into Cobra.

Repeat on the other side.

Flow 2: Standing and Hip Mobility

Move into Warrior II, then transition to Goddess Pose.

Continue into a Wide-Leg Forward Fold and pause for several breaths.

From there, explore:

  • Malasana or Low Squat
  • Butterfly Pose
  • Head-to-Knee Forward Fold
  • a comfortable Seated Twist

The goal is not to get deeper into each pose. Use the breath to notice where you can create both effort and ease.

Use Breath as Feedback

Your breath can tell you a lot about how hard you are working.

If it becomes frantic, strained or impossible to control, that may be a sign to slow down, modify the pose or rest.

You do not need to maintain Ujjayi at all costs.

Sometimes returning to ordinary breathing is exactly what your body needs.

Ujjayi and Mindfulness

One reason I appreciate breathwork in yoga is that it brings attention inward.

The sound and rhythm of the breath can make it easier to notice tension, effort and distraction without immediately reacting to them.

If you are interested in this connection between breath and awareness, you may also enjoy Mindfulness: A Simple Practice for Stress, Awareness and Well-Being.

For a deeper counselling perspective on breath, stress and the nervous system, you can also read Breathwork, the Nervous System, and Epigenetic Trauma.

A Simple Intention for Practice

You can use an intention without making it complicated.

For example:

What are you nourishing right now?

As you inhale, notice what you want to make space for.

As you exhale, notice what you are ready to soften or release.

The intention is not to force a particular emotional experience. It is simply another way to bring attention to the practice.

Let the Breath Support the Practice

Ujjayi is a tool, not a requirement.

Some days it may help you feel focused and connected. Other days normal breathing may feel better.

The best breath is one that supports your movement rather than becoming another thing you have to perform perfectly.

If you would like to explore breath-led movement in person, learn more about Yoga & Mobility Classes in Nanaimo.

Classical Sun Salutations and Yin-Inspired Yoga Sequence

Classical Sun Salutations and Yin-Inspired Yoga Sequence

Classical sun salutations, tree pose, deep belly breath, yoga class classical sun salutation, classical sun salutation, butterfly pose, bridge pose, reclining figure 4 pose, sound vibration, Om shanti om

This yoga class combines Classical Sun Salutations, standing poses, balance, longer-held floor poses and breath awareness. It was originally created as part of a series of lesson plans for yoga teacher training, with each class gradually building on the one before it.

The intention is not to force flexibility or create the “perfect” pose. It is to use movement, breath and attention together in a way that feels steady and grounded.

Begin With Tree Pose

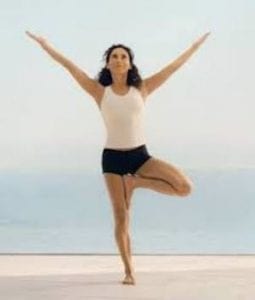
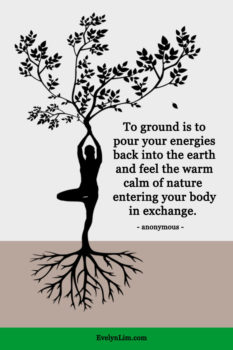
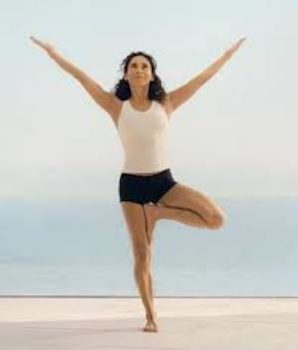
Start in Tree Pose, or Vrksasana.

Stand tall on one leg and place the other foot somewhere comfortable, such as the ankle, calf or inner thigh. Avoid pressing directly into the knee.

Use the pose as an opportunity to notice your balance and breathing.

If balance feels difficult, keep one hand on a wall or chair.

Add Deep Belly Breathing

Before moving into the flow, take a few slower breaths and notice the lower ribs and belly expanding as you inhale.

Let the exhale soften naturally.

The goal is not to force a huge breath. It is simply to slow down and bring more attention to the way you are breathing.

Classical Sun Salutation

Move into a simple Classical Sun Salutation at a comfortable pace.

You might include:

  • Mountain Pose
  • Forward Fold
  • Half Lift
  • Low Lunge
  • Plank or knees-down variation
  • Cobra
  • Downward-Facing Dog
  • Low Lunge on the second side
  • Forward Fold
  • return to standing

Repeat several rounds if it feels good.

Add Lunge Variations

Once the basic pattern feels familiar, add variations such as:

  • low lunge with arms reaching up
  • gentle lunge twist
  • prayer twist if appropriate
  • transition from Low Lunge to Half Split

Move slowly enough that you can keep the breath steady.

Warrior I and Warrior II

From the lunge, transition into Warrior I and then Warrior II.

Use these poses to explore strength through the legs and stability through the feet.

Rather than trying to force a particular stance, adjust the width and length of the position until it feels stable.

Chest Expansion

From standing, interlace the hands behind the back if comfortable and gently open the chest.

Keep the shoulders relaxed and avoid pulling aggressively.

You can combine this with a wide-legged stance or simply stay upright.

Wide-Leg Forward Fold

Step the feet wide and move into Prasarita Padottanasana, or Wide-Leg Forward Fold.

Keep a soft bend in the knees if that feels better.

You can place the hands on the floor, yoga blocks or thighs depending on your mobility.

Longer-Held Floor Poses

The second half of the class can slow down into longer-held floor shapes.

These are Yin-inspired rather than strict traditional Yin Yoga, since some of the poses are more active than a classic Yin sequence.

Malasana

Come into a comfortable squat.

Use blocks, a wall or support under the heels if needed.

Butterfly

Sit with the soles of the feet together and let the knees open comfortably.

You can remain upright or fold forward gently.

Bridge Pose

Lie on your back with knees bent and feet on the floor.

Lift the hips into Bridge Pose and hold for a few breaths.

For a more restorative variation, place a yoga block under the pelvis and allow the body to relax.

Reclining Figure Four

Cross one ankle over the opposite thigh.

Stay here or draw the legs gently toward you.

This should feel like a comfortable stretch through the hip, not a sharp pull.

Reclining Spinal Twist

Lie on your back and allow the knees to fall gently to one side.

Keep the twist comfortable and avoid forcing the knees toward the floor.

Repeat on the other side.

Rest and Notice

After the final poses, spend a few minutes resting in Savasana or another comfortable position.

Notice the breath, the points of contact with the floor and how your body feels after moving.

There is nothing you need to change.

Mantra and Closing

If mantra is part of your practice, you might close with Om Shanti Om, traditionally associated with peace.

You can also end simply with a few quiet breaths.

The closing does not need to be elaborate. The purpose is to give the nervous system and attention a chance to settle before returning to the rest of the day.

Use the Sequence as a Framework

This sequence can be adapted to many different levels.

Beginners can use more support, shorter holds and fewer repetitions. More experienced students can explore longer balances, deeper lunges or additional transitions.

The most important part is keeping the breath steady and choosing versions of the poses that suit the person practicing them.

If you want to explore breath-led movement in person, learn more about Yoga & Mobility Classes in Nanaimo.

You may also enjoy Ujjayi Breath: How to Practice It in Yoga and Yoga Breathwork: Ujjayi, Nadi Shodhana & More.