
Healthy and Delicious Raw Nanaimo Bar Recipe Without Refined Sugar – Perfect for Vancouver Island, Nanaimo Residents
If you have a sweet tooth but are trying to be more health-conscious, you’re not alone! Many people struggle with reducing their sugar intake. However, consuming too much sugar can lead to a variety of health problems, including weight gain, tooth decay, and an increased risk of developing type 2 diabetes.
Fortunately, there are ways to satisfy your sweet tooth without resorting to refined sugar-laden desserts. One option is to try making raw desserts using natural sweeteners. Raw desserts are made with whole, unprocessed ingredients and are typically free of dairy, gluten, and refined sugar.
One delicious raw dessert that you can try is a raw Nanaimo bar. Nanaimo bars are a classic Canadian dessert, named after the city of Nanaimo on Vancouver Island. The traditional recipe calls for a chocolate crumb base, a layer of vanilla custard, and a chocolate glaze on top. This raw version of the Nanaimo bar is made with all natural ingredients and no refined sugar.
Here’s the recipe:
Raw Nanaimo Bars
Ingredients:
Base Layer: Chocolate Crust
- 1 cup slivered almonds
- 1/2 cup soaked dates
- 1/2 cup unsweetened shredded coconut
- 1/4 cup cocoa powder
- dash of salt
Middle Layer: Cream
- 1/4 cup coconut oil
- 1/2 cup soaked cashews
- 3 tbsp raw unpasteurized honey
- a few drops of stevia
- 1/4 cup coconut milk
- 1/2 tsp vanilla extract
Top Layer: Chocolate Topping
- 1/2 cup soaked cashews
- 1/2 cup cocoa powder
- 1/2 cup coconut oil
- 1/4 cup raw unpasteurized honey
- a few drops of stevia
Directions:
-
Place all the base layer ingredients into a food processor and blend until dough-like. Be sure to stop the food processor to scrape down the sides and process more.
-
Press the dough into an 8×8 inch baking pan, making sure to press down firmly.
-
Place all the middle layer ingredients into a food processor and blend until smooth. Again, stop the food processor to scrape down the sides and process more.
-
Spread the middle layer onto the base layer in the baking pan, making sure to spread it evenly.
-
Place all the top layer ingredients into a food processor and blend until smooth. Once again, stop the food processor to scrape down the sides and process more.
-
Spread the final layer onto the middle layer in the baking pan, making sure to spread it evenly.
-
Place the pan into the freezer for 1-3 hours.
-
Remove from the freezer, cut into bars, and serve.
-
Store the raw Nanaimo bars in the freezer.
By using honey and stevia instead of refined sugar, this raw Nanaimo bar recipe is a healthier option for satisfying your sweet tooth. Honey has numerous medicinal properties and can be used as a natural sweetener in many recipes. Stevia is a natural sweetener that doesn’t affect your blood sugar levels, making it a great alternative for those with diabetes or who are watching their sugar intake.
In addition to being a healthier option for dessert, raw Nanaimo bars also contain beneficial nutrients. Almonds are a great source of protein and healthy fats, while cashews are a good source of iron and magnesium. Coconut oil is high in healthy fats, which have been linked to improved brain function and heart health.
By incorporating raw desserts like these raw Nanaimo bars into your diet, you can enjoy a sweet treat without sacrificing your health goals.
Make sure you check the other recipes I have to offer you:

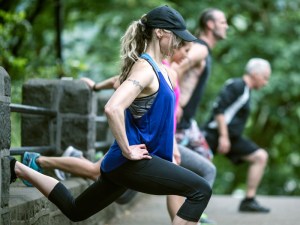 If you are new to working out, hiring a personal trainer can be a smart idea. Personal trainers are health and fitness professionals who can design safe and effective exercise programs tailored to your goals and fitness level. Whether you want to lose weight, build muscle, or improve your overall fitness, a personal trainer can help you achieve your desired results faster than working out on your own.
 Metabolism is a critical process that occurs in our bodies, responsible for converting the food we consume into energy. Even when we are at rest, our body requires energy to carry out basic functions such as breathing, growing, repairing, digesting, and circulating blood. This energy requirement is known as the basal metabolic rate, or metabolism. Several factors play a role in determining our metabolism, including body size and composition, gender, and age.
 One key factor in our metabolism is muscle mass. The more muscle mass we have, the more calories we burn, even when we’re not physically active. Unfortunately, there are many misconceptions about weight training, and some people are hesitant to build muscle mass because they believe it will make them bulky. However, gaining lean muscle mass is not easy, especially for women. It requires a significant amount of training and a high protein diet.
 Maintaining and building muscle mass can have numerous benefits beyond boosting metabolism. For example, it can improve bone density, reduce the risk of injury, and enhance overall physical performance. It’s essential to take action to maintain muscle mass, as the average person loses approximately one-half pound of muscle per year after the age of twenty.
 Strength training is an essential component of any fitness routine. Incorporating activities like weightlifting, bodyweight exercises, and High-Intensity Interval Training (HIIT) can have numerous benefits for your physical and mental health. Here are ten reasons why you should consider adding strength training to your workout schedule.
 Are you ready to start your fitness journey but unsure of where to begin? A fitness test can help you measure your initial performance and progress. By performing a fitness test, you can identify your strengths and weaknesses and have concrete results to measure your progress over time.
 The first step is to document your current physical state. Take a picture of yourself from the front, side, and back, while holding yourself naturally. Then, take measurements of your chest, waist, hips, thighs, calves, and biceps. If you’re unsure of where to take these measurements, watch our video to learn the proper techniques. Weigh yourself and record the date and time of the measurement. We recommend weighing yourself in the morning, preferably naked. If you have access to a tool to measure your body fat percentage, record that as well.